
To ensure a smooth start to your plaster ceiling rose project, dive right into the introduction. Discover what a plaster ceiling rose is and gain a brief overview of the benefits associated with its installation. Explore the solution to achieve a seamless introduction to the world of plaster ceiling roses.
Explanation Of What A Plaster Ceiling Rose Is
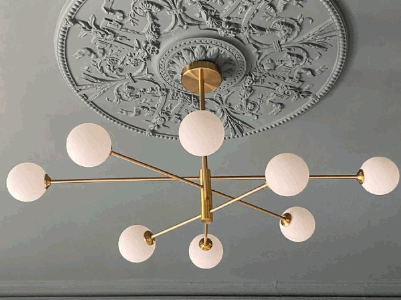
A plaster ceiling rose is a decorative item for the ceiling. It’s made of plaster and often has intricate designs. People have used them for centuries to add grandeur and elegance to a room.
Victorians were the first to use them. They used them to cover up electric lighting wiring. But over time, people saw them as art pieces that showed off craftsmanship.
Plaster ceiling roses are versatile. You can get them in different shapes, sizes, and designs. From floral patterns to geometric designs, there’s something to suit any taste.
Plus, you don’t just have to use them in vintage interiors. They can be a striking focal point in modern spaces too.
A Brief Overview Of The Benefits Of Installing A Plaster Ceiling Rose
A plaster ceiling rose can bring a touch of elegance and several practical benefits to any room. Here are some reasons why it’s a wise choice:
- Aesthetics: Plaster ceiling roses have an exquisite look that draws attention and creates a sense of grandeur.
- Architectural Sophistication: Intricate designs and ornamental details add a timeless and refined look.
- Hiding Imperfections: With its ornate patterns, flaws in the ceiling can be concealed.
- Easy Installation: Despite its intricate appearance, it’s relatively simple to mount onto a ceiling.
- Increasing Value: It adds value to your home or property, making it a worthwhile investment.
Customization is also available. According to Architectural Digest, plaster ornaments like ceiling roses have been symbols of wealth and luxury for centuries.
So, if you want an elegant way to improve your interior space, consider installing a plaster ceiling rose. It will certainly leave a lasting impression.
Materials And Tools Needed
To efficiently fit a plaster ceiling rose with the required materials and tools, the following sub-sections will provide you with a solution. Discover the list of materials needed for the installation and the essential tools required to ensure a successful and hassle-free installation process.
List Of Materials Required For The Installation
When tackling the installation process, have these 4 key items ready:
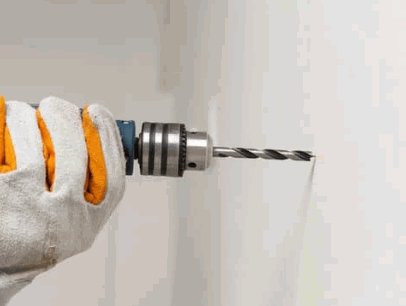
- Sturdy drill – adjustable speed settings and interchangeable bits.
- Measuring tape – for accurate measurements.
- Level tool – bubble or digital.
- Safety gear – goggles, gloves, ear protection.
Remember: Quality matters! Spend more on better tools. Plan and create a detailed plan. Seek guidance if needed. Practice caution and wear protective gear. With the right tools and following these tips, any installation task can be done with precision!
List Of Tools Needed For The Installation
Installing a new product or equipment? You’ll need tools! Here’s a list to help you install efficiently:
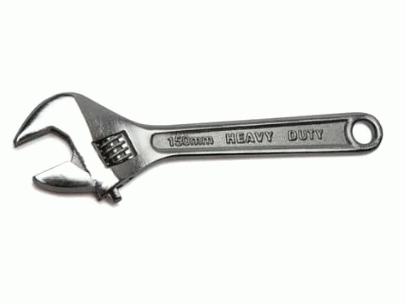
- Wrench: Tighten and loosen nuts and bolts
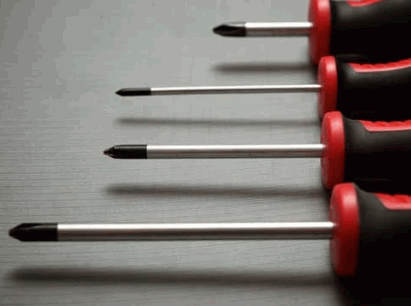
- Screwdriver: Secure screws into wood or metal
- Drill: Make holes for mounting components
- Tape measure: Accurate measurements for alignment and fit

Keep in mind that other specialized tools may be needed based on the installation’s requirements. A wire cutter and stripper? Or a level for alignment? Plus, safety equipment like gloves and goggles are essential.
Fun Fact: Tool usage dates back 2 million years! Homo habilis, 2.6 million years ago, was the first to use tools. Source: Smithsonian Magazine.
Preparing For Installation
To prepare for installing a plaster ceiling rose, start by checking the condition of the ceiling. Then, measure and mark the location for the plaster ceiling rose.
Checking The Condition Of The Ceiling
Examine the surface for cracks and damage. Check for water stains, dampness, or leaks. Tap on the ceiling to assess its stability. Make sure there are no exposed wires or electrical issues. Evaluate if the ceiling can hold heavy fixtures or equipment.
Do regular maintenance checks and address any issues quickly. Seek professional advice if you have doubts. Taking proactive measures will ensure proper installation and maintain the longevity of your ceiling structure. This will also promote safety and durability in your living space.
Measuring And Marking The Location For The Plaster Ceiling Rose
Installing a plaster ceiling rose starts with measuring and marking the location. This ensures it is placed symmetrically and looks great! Here’s how:
Step 1: Find the center. Measure and mark the room’s length and width. Divide each by two to find the middle of each wall.
Step 2: Decide the distance from the walls. Choose how far from each wall you want the rose. Measure and mark those points.
Step 3: Connect the marks. Use a straightedge to join all the points. This forms the shape of the rose.
Also, consider other factors like light fixtures. Make sure there is enough space around them so they are not blocked by the rose.
Pro Tip: Use painter’s tape to create a mock-up of the rose before making any permanent changes. This lets you see what it will look like.
Installing The Plaster Ceiling Rose
To install the plaster ceiling rose, start by applying adhesive to its back. Align the rose with the ceiling markings and press it firmly onto the ceiling. Allow the adhesive to dry for a secure installation. These steps – applying adhesive, aligning, pressing, and allowing drying – will help you fit the plaster ceiling rose seamlessly.
Applying Adhesive To The Back Of The Plaster Ceiling Rose
To apply adhesive to the back of the plaster ceiling rose, follow these steps:
- Clean the ceiling where you plan to install the rose. Remove dust and debris.
- Apply adhesive onto the back of the rose. Use a trowel or spatula to spread it evenly.
- Position the rose carefully on the ceiling. Align it with any existing light fixtures or decorative elements.
- Press and hold the rose against the ceiling for a few minutes to bond the adhesive.
- Wait at least 24 hours for the adhesive to dry completely before painting or finishing.
Be aware not to use too much adhesive. It may ooze out from the rose. Check if the adhesive is suitable for plaster materials.
Installing plaster ceiling roses has been practiced for centuries. Ancient Romans used to adorn grand villas and public structures with ornate plaster decorations. Today, people use this classical design element to add elegance and sophistication to their ceilings. By following exact installation methods, you can ensure your plaster ceiling rose stays in place for years.
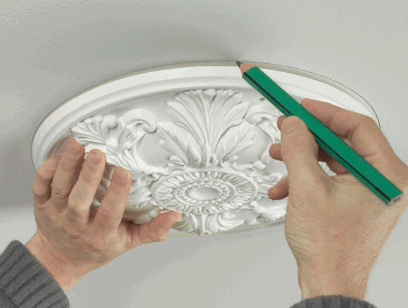
Aligning The Ceiling Rose With The Markings On The Ceiling
Mark the center of your desired location for the ceiling rose on the ceiling using a pencil. Measure from the center point to each side of the room to determine equal spacing. Use a measuring tape and mark these distances on the ceiling with light pencil lines. Align the center point of the ceiling rose with your mark on the ceiling. Ensure it is centered and straight. Securely attach the rose with adhesive or screws. Follow manufacturer instructions.
Double-check all measurements for consistency before installation. Attention to detail will contribute to an aesthetically pleasing outcome. Fun fact: Plaster has been used in home decor since ancient Roman architecture!
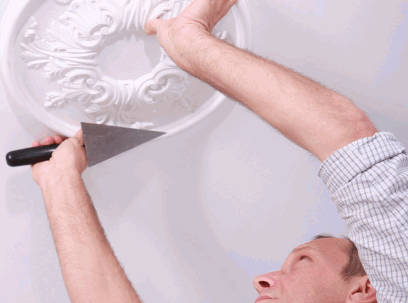
Pressing The Ceiling Rose Firmly Onto The Ceiling
To apply a ceiling rose correctly, follow these 3 simple steps:
| Step | Instructions |
|---|---|
| 1. | Place: Center the rose with the ceiling electrical fitting. Make sure it’s lined up right to avoid any imbalance. |
| 2. | Adhesive: Put on an even layer of plaster-specific adhesive with a trowel/putty knife. Cover all edges/corners. |
| 3. | Press & Hold: Firmly press the rose on the ceiling. Start at the center & move outwards. Hold for a few minutes. |
It’s important to press firmly – this creates a strong bond & stops gaps/loose fittings. For better results:
- Clean both surfaces before applying adhesive.
- Secure any light fixtures attached to the ceiling rose.
- Get help from a pro if you’re not sure about DIY skills.
By following these steps & pressing firmly, you’ll get a beautiful finish & long-lasting durability.
Allowing The Adhesive To Dry And Secure The Ceiling Rose In Place
Installing a plaster ceiling rose? Allow the adhesive to dry! To secure the rose and ensure it’s stable, follow these five steps:
- Use a trowel or putty knife to apply a generous amount of adhesive to the back of the rose.
- Place the rose firmly on the ceiling, making sure it’s centered and aligned with any existing light fixtures or other decorations.
- Hold the rose in place for 5 minutes.
- After the initial setting time, release pressure but don’t move the rose for 24 hours so the adhesive can dry fully.
- When dry, check if any gaps or unevenness exist. Fill in with more adhesive and smooth out with a putty knife or damp cloth.
Remember – no touching or putting weight on the rose while waiting. And read the manufacturer’s instructions for the correct drying time and adhesive type for plaster materials.
Stick to these steps and your plaster ceiling rose will stay secure and beautiful for years to come. Just ask the homeowner who installed their own – their attention to detail paid off, with a stunning result and lots of compliments!
Finishing Touches
To achieve the perfect finishing touches for your plaster ceiling rose, follow these steps: Clean up any excess adhesive that may be visible, then consider touching up or painting the plaster ceiling rose if desired. These simple yet effective solutions ensure a flawless and polished result for your ceiling decoration.
Cleaning Up Any Excess Adhesive
Arm yourself with the right tools: putty knife or scraper, clean cloth or sponge, and adhesive remover (if needed).
Gently scrape off excess adhesive. Take care not to damage the surface.
Wipe away any remaining residue with warm water and cloth or sponge. Use a mild soap or adhesive remover for stubborn spots.
Check the surface type. Different materials call for different cleaning methods. For glass, vinegar or rubbing alcohol may work.
Once cleaned, dry the area with a clean towel or let it air dry.
Inspect if there are leftover traces of adhesive. Repeat steps if needed.
Manufacturer’s guidelines are key. Read them for optimal results.
Fun fact: Hot glue guns were invented in 1954 by Robert Brookings. In 1960, his company Borden Inc. patented the device.
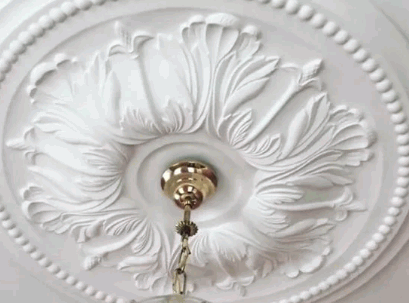
Touching Up Or Painting The Plaster Ceiling Rose, If Desired
Polish up your space and give your plaster ceiling rose a refined look. Follow these steps for a fresh finish:
- Clean: Use a soft cloth or sponge to get rid of dust and dirt.
- Repair: Check for cracks or chips. Smooth them out with fine-grit sandpaper. Wipe away dust.
- Color: Pick a hue to match the room or go bold with a contrasting shade.
- Paint: Start with a layer of primer. Then, use a small brush to paint details. Continue until you get the desired depth.
Add a touch of flair with metallic paints or glazes for a captivating focal point. With some TLC, your plaster ceiling rose can enhance the elegance of your space. Don’t wait – take action now and be amazed at the results!
Uncover more: Can Plaster Be Painted
Tips And Precautions
To ensure a smooth and damage-free installation process for fitting a plaster ceiling rose, we present valuable tips and precautions. Discover helpful insights for a seamless installation, while also safeguarding both the plaster ceiling rose and the ceiling itself. Follow these expert suggestions to achieve a successful and trouble-free outcome.
Precautions To Take To Avoid Damaging The Plaster Ceiling Rose Or The Ceiling
To ensure your plaster ceiling rose and ceiling stay safe, take proper precautions! Here are a few steps:
- Handle carefully: When working near the ceiling, be gentle and don’t use too much force.
- Cover the area: Before any dust-causing activity, like drilling or sanding, cover the floor and furniture with protective sheets.
- Use the right tools: When installing lights or repairing, use lightweight, low-vibration tools.
Regularly inspect for signs of damage and address them quickly. If unsure about intricate repairs, consult professionals.
Follow these tips and your plaster ceiling rose will stay beautiful for years to come, according to Home Improvement Magazine.
Conclusion
To conclude, equip yourself with the knowledge and skills to fit a plaster ceiling rose effortlessly. Recap the steps involved in fitting a plaster ceiling rose and consider the benefits and aesthetic value it brings to your space. Enjoy the timeless elegance and added charm a plaster ceiling rose can provide.