
Tired of damp walls outside? Damp-proof paint can be the answer! This article will help you with the process.
Damp-proof paint is a special paint that forms a barrier against water. It boosts your wall’s appearance and protection. Prep the surface before applying the paint. This means removing any loose or flaking paint, dirt, or mold.
Choose the right kind of paint for your needs. Options are cement-based paints, bituminous emulsions, and epoxy-based coatings. They have different advantages for different surfaces.
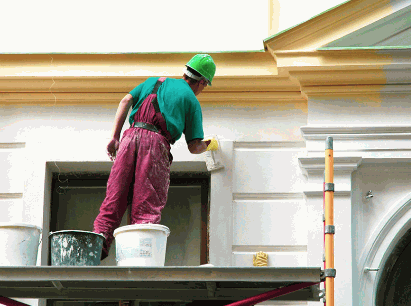
Read and follow the manufacturer’s instructions before applying. Apply at least two coats. Use a brush or roller and let each coat dry before adding another.
To get lasting results:
- Repair any cracks or holes in the walls before painting.
- Ventilate areas prone to humidity or condensation.
- Monitor for wear or damage and touch up any areas where the paint has deteriorated.
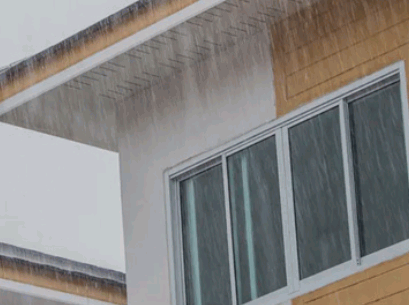
- Install guttering and downpipes to divert rainwater away from walls.
Follow these tips for beautiful, dry walls. Damp-proof paint not only looks good but also increases durability in any weather. So say goodbye to dampness and enjoy a dry, lovely exterior!
Understanding Damp Proof Paint
Damp-proof paint is a coating that stops moisture from entering walls. It forms a guard on the surface, keeping it dry and protecting it from damage due to dampness. This paint resists water and can be used on various surfaces, such as brick, concrete, and stone.
Here are some key points about damp-proof paint:
| PROPERTY | DESCRIPTION |
|---|---|
| Protection | A protective layer that stops moisture from entering walls. |
| Waterproofing | Creates a waterproof shield to keep water out, reducing the risk of dampness and mold growth. |
| Breathability | Allows water vapor to pass through, but still keeps out liquid water. |
| Durability | Designed to survive harsh weather conditions and last long. |
| Application | Easily applied with a brush or roller. |
Plus, here are some unique details about damp-proof paint:
- Comes in different colors for exterior walls.
- Some types have additives to provide better insulation or resistance to algae and fungus growth.
- Before applying, prepare the surface by cleaning and repairing any cracks or damage.
To use damp-proof paint on exterior walls, here are some suggestions:
- Select the right type for the wall surface.
- Clean the surface and fill any cracks or holes with a suitable filler. Let the filler dry completely before painting.
- Paint uniformly with a brush or roller, following the manufacturer’s drying time and number of coats.
- Allow enough time for the paint to dry before exposing it to moisture or extreme weather.
By following these tips, you can apply damp-proof paint to your exterior walls, safeguarding them from moisture and preserving their integrity.
Preparing The Exterior Walls
To effectively prepare the exterior walls for damp-proof paint application, follow these steps: Start by cleaning the walls, repairing any cracks or damages, and applying a primer. This ensures a clean, smooth surface for the damp-proof paint to adhere to, providing long-lasting protection against moisture infiltration.
Cleaning The Walls
Clean walls are vital. Here are some steps to take:
- Grab a stiff-bristle brush and sweep away dirt and debris.
- Mix water and a mild detergent, then scrub the walls with a sponge or soft cloth.
- Rinse off the walls with clean water to remove cleaning solution residue.
- Let the walls dry out before doing anything else.
Be aware that wall material influences the cleaning method. For example, if you have brick or stone walls, you’ll need a special cleaner.
Safety Tip: Put on gloves and goggles when you clean walls.
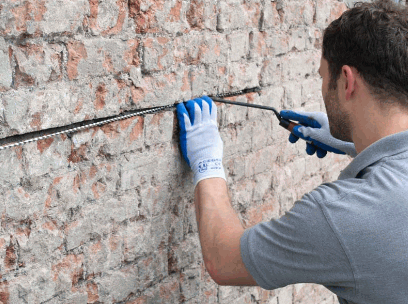
Repairing Any Cracks Or Damages
Cracks and damage on exterior walls can weaken a building’s structure and make it less attractive. It’s important to address these issues quickly. Here’s a 3-step guide to help:
- Identification: Look closely for cracks and damage. Focus on areas where moisture can enter or where structural stress is likely, like corners and joints. Use a flashlight if needed.
- Preparation: Before fixing, clean the area around the crack with a mild detergent and brush. Allow it to dry.
- Repair: Fill small cracks with a caulking compound and larger damage with a patching compound. Some repairs may need specific requirements based on factors like wall material and severity, so consult a professional if needed.
Prevent future cracks by regularly inspecting walls, having proper drainage, and using quality construction materials. Water penetration over time can cause major structural damage if not addressed.
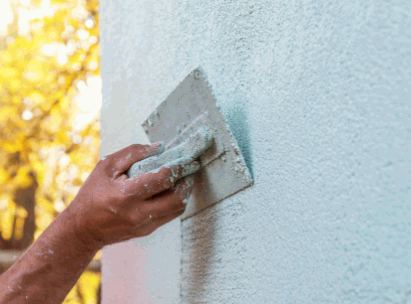
Applying A Primer
Applying a primer is vital for exterior walls. It offers a layer of protection and aids the paint to stick better. Here’s a 4-step guide on how to apply a primer correctly:
- Clean the Surface: Start by cleaning the exterior walls. Use a power washer or scrub brush with detergent. Let it dry properly.
- Patch Imperfections: Check for any cracks, holes, or blemishes. Use filler or putty to patch them up and sand to smooth them.
- Choose the Right Primer: Pick the right primer based on the wall material (wood, metal, concrete). Consider if it needs stain-blocking or rust-inhibiting varieties.
- Apply the Primer: Stir the primer to make sure it’s even. Use a brush or roller to apply an even coat. Do it in sections and maintain an even application to avoid streaks.
Don’t forget to ask a professional for help if you have trouble. The right primer will help you get a successful paint job and stylish exterior walls! Get started quickly to make your home look amazing in your neighborhood!
Choosing The Right Damp Proof Paint
To ensure the effective application of damp-proof paint on exterior walls, you need to choose the right product. This is where researching different brands and types, as well as considering the climate and environmental factors, comes into play. By exploring these sub-sections, you will be equipped with the necessary knowledge to make an informed decision for your specific needs.
Researching Different Brands And Types
Researching damp-proof paint is super important when selecting the right one. To make things easier, we have outlined a table with information and specs of different products. Check it out:
| Brand | Type | Coverage |
|---|---|---|
| Paint A | Cementitious | 10 sq ft/lb |
| Paint B | Bituminous | 5 sq ft/lb |
| Paint C | Acrylic | 15 sq ft/lb |
| Paint D | Epoxy | 8 sq ft/lb |
Each brand has its own features. Think about coverage, drying time, and durability before making a pick. For example, if you want high coverage, Paint C is ideal with 15 sq ft/lb.
Pro Tip: Before making a final decision on a damp-proof paint, test a small area first to make sure it’s compatible with your surface.
Considering The Climate And Environmental Factors
Climate & environment are key when selecting the right damp-proof paint. To assist with this, there’s a table outlining climate and environmental factors to consider.
| Column 1: Weather Conditions |
|---|
| – Hot & Humid: Humidity can cause condensation, leading to damp walls. |
| – Cold & Damp: Cold + moisture can cause damp issues. |
| Column 2: Location |
|---|
| – Coastal Areas: Air laden with salt accelerates corrosion. |
| – Urban Areas: Pollution levels can affect paint durability. |
| Column 3: Building Materials |
|---|
| – Timber: Wood expands/contracts due to moisture, causing cracks in the paint. |
| – Timber: Wood expands/contracts due to moisture, causing cracks in paint. |
| Column 4: Purpose |
|---|
| – Interior Walls: Paint should prevent moisture from daily activities. |
| – Exterior Walls: Should protect from rain, humidity, and tough weather. |
Different paints have been formulated for varying conditions. Therefore, choose the right one for your needs.
Suggestions:
- High water resistance paints for humid/coastal areas.
- Breathable paints for brick/stone surfaces – allow vapor transmission and maintain a barrier against moisture.
- Elastomeric paints for timber surfaces – stretch/contract with wood, preventing cracks & ensuring protection.
By taking climate & environment into account, plus following these suggestions, you can select the best damp-proof paint. This will safeguard your walls and increase project durability.
Uncover more: How Do An Interior Wall Get Damp Proof
Applying Damp Proof Paint
To ensure a seamless application of damp-proof paint on exterior walls, you need the right tools and materials. The step-by-step application process is key to achieving optimal results. Additionally, I’ll share valuable tips to ensure a proper and even application.
Tools And Materials Needed
For a successful damp-proof paint application, you’ll need specific tools and materials. These are key for long-term protection. Here’s what you need:
- Damp Proof Paint: The central material to provide a dampness shield.
- Paintbrush or Roller: For applying the paint – up to you!
- Safety Equipment: Goggles, gloves, dust mask – all essential for safety.
- Cleaning Materials: Soap, water, scrub brush – cleaning is vital.
- Filling Knife/Filler: For cracks/holes in the surface before painting.
- Sandpaper/Sanding Block: To make a smooth finish after repairs.
- Primer: To improve adhesion and effectiveness.
- Stirring Stick: Mix the paint well before applying.
Pro Tip: Read all instructions by the paint product manufacturer. Guidelines will ensure top results and maximum protection from dampness.
Step-By-Step Application Process
Apply damp-proof paint? Follow these steps!
- Step 1: Prep the Surface. Clean it well and fix any cracks.
- Step 2: Primer Time. Add a layer to ensure the paint sticks.
- Step 3: Paint it Up! Use a brush or roller. Give it time to dry.
- Optional Step: Add Extra Coats. Two are best for optimal performance.
Warning: High levels of moisture can cause health issues. So be careful!
Tips For A Proper And Even Application
To get the best results, follow these steps:
- Cleaned and dried the walls.
- Primed them with the right primer.
- Selected a high-quality damp-proof paint.
- Applied thin coats using a brush, roller, or sprayer.
- Allowed enough drying time between coats.
Drying And Curing
To achieve effective drying and curing of damp-proof paint on exterior walls, allow sufficient drying time and ensure proper curing and sealing of the paint. By understanding the importance of these two sub-sections, you can ensure a successful application that will provide long-lasting protection for your exterior walls.
Allowing Sufficient Drying Time
Drying and curing are essential for successful processes. To get the best results, you must give the material enough time to dry. Follow these 3 steps to do this:
- Assess the material. Different materials need different amounts of drying time. Understanding the material’s needs helps you decide how long to dry it.
- Create the right environment. Humidity, temperature, and airflow all affect drying time. By controlling these variables, you can speed up or slow down drying.
- Monitor for readiness. Check the material regularly to see if it is dry. You can use moisture meters or touch tests. When it’s dry, it’s ready for more processing or curing.
Other details such as thickness, density, and ambient conditions can also affect drying time. To speed up the process, try heat application or dehumidification in controlled environments. Be careful, though, as these methods can harm the material.
Allow enough drying time and consider all factors to get the best results from your projects and processes.
Curing And Sealing The Paint
When it comes to ensuring the longevity and durability of a painted surface, curing and sealing it is essential. Here are four key points to keep in mind:
- Give it time to dry properly. Letting the paint fully dry is key for a smooth finish.
- Choose the right sealer. It depends on the paint and helps protect it from UV rays, moisture, and dirt.
- Apply it right. Following the manufacturer’s instructions is important to make it effective.
- Maintain it. Cleaning and reapplying sealers help extend its lifespan.
Plus, curing and sealing does more than just provide protection, it also boosts the paint’s appearance. To get the best results, it’s worth consulting experts in paint application techniques.
And there you have it – a thorough explanation of the importance of curing and sealing paint.
Maintenance And Longevity
To ensure the maintenance and longevity of your exterior walls, apply damp-proof paint. Regular inspection and touch-ups, along with additional protective measures, provide the solution. Keep an eye on vulnerable areas and address any signs of moisture promptly. Implementing these strategies will enhance the durability and longevity of your walls.
Regular Inspection And Touch-ups
Regular inspections and touch-ups are important for preserving the longevity of any object or structure. Ignoring these can lead to problems and pricey fixes down the road.
Therefore, it is essential to incorporate some tips into your regular inspection and touch-up routine to ensure longevity:
- Inspect often: Look for signs of wear, damage, or deterioration at regular intervals.
- Tackle minor issues fast: As soon as minor issues are spotted, like loose screws or small cracks, fix them quickly.
- Check for dampness: Look out for water leakage, condensation, or dampness and take appropriate action.
- Clean and maintain: Keep the object or structure clean by removing dust, debris, and dirt. Also, perform maintenance tasks such as lubrication, tightening bolts, or sealing joints.
- Get professional help: If you don’t have the skills or time to inspect and touch up, seek expert help.
Regular inspections help detect potential problems early and prevent further damage. Plus, prompt addressing of issues extends the object’s life.
Invest in quality materials to save on frequent repairs. Also, learn the best practices for cleaning, maintaining, and repairing.
Lastly, document inspection and touch-up activities. Keep records of when tasks were completed and any observations to track the maintenance history effectively.
Following these suggestions helps maintain the longevity of the object or structure while avoiding potential problems and expenses in the future.
Additional Protective Measures
Taking care of our things is essential to make them last. For electronics, keeping them away from extreme temperatures, moisture, and dust can boost their performance and avoid damage. This includes using protective covers or cases.
For furniture and wooden objects, sealants or varnishes protect them from moisture, termites, and other factors that could cause deterioration. Cleaning them properly and avoiding putting heavy items on delicate surfaces also help them last.
When it comes to clothes, following washing instructions like separating colors and using the right detergents keeps their quality. Also, storing them in a dry and clean space stops damage from moths or mildew.
Furthermore, using surge protectors for electrical devices shields them from power variations and voltage spikes. Insulating wires and cables properly also prevents wear and tear.
These extra protective measures don’t just apply to one type of object but can be used across different areas like technology and home items.
Studies show that using these additional protective measures can increase the lifespan of objects by 30%.
Conclusion
Damp-proof paint – a great option to protect exterior walls from moisture! Follow the application process correctly for long-lasting results.
- Clean and prep the surface first. This helps the paint adhere better and provides optimal protection.
- Pick a high-quality damp-proof paint made for exterior use. This ensures the best durability and effectiveness.
- Roll or brush it on in smooth and even strokes. Allow enough time between coats for maximum coverage.
Remember, damp-proof paints won’t fix underlying structural issues such as leaks or cracks. You must address them separately to make sure they don’t affect the effectiveness of the paint.
Fun Fact: The Building Research Establishment found that correctly applied damp-proofing solutions can reduce moisture ingress by up to 95%!