
Damp-proofing exterior walls is essential for keeping a building in good condition. It helps stop water from getting in and causing damage, mold, and other problems. Here, we’ll talk about ways to damp-proof walls.
One way is to paint or coat the walls with something waterproof. This will protect them from water and keep them strong. Another way is to fit a damp proof course (DPC) at the bottom of the walls. This is a physical barrier that stops damp rising up.
It’s also important to fill in any cracks or gaps in the walls, to stop moisture from getting through. Use sealant or mortar. You should also check the walls regularly and act quickly if you spot signs of dampness.
Understanding The Importance Of Damp-Proofing Exterior Walls
When damp-proofing exterior walls, it is important to select the right materials. Coatings and sealants can form a barrier against moisture. Applying them correctly ensures complete coverage. Drainage systems should also be in place to stop water from reaching the foundation.
Any issues that could cause dampness should be addressed. For example, fixing cracks or gaps in the masonry, improving insulation, or installing ventilation. Inspections and maintenance will help identify potential problems early.
There are various methods for damp-proofing, depending on climate, materials, and budget. Professionals can advise on the best approach for each situation.
The National Building Research Institute stresses that neglecting damp-proofing can have serious consequences, such as damage to the building and air quality. Taking preventative measures is better than having to repair it later.
Assessing The Condition Of The Walls
Scan the walls for any cracks or peeled paint. Also, search for water stains or mold spots. Analyze the condition of the pointing between the bricks. Check if there is efflorescence on the wall surface.
Be aware of vegetation that may cause dampness, like overhanging trees or dense shrubs.
Look into damp proofing treatments and their effectiveness in the past.
Moreover, consider the special details that affect the walls’ condition. This could be, for example, exposure to extreme weather, proximity to water sources, or historic building techniques.
Tip: Before damp proofing, take care of existing issues in the walls. Repairing cracks and removing sources of moisture will help the damp proofing last longer.
Preparing The Walls For Damp-Proofing
- Scrape or sandpaper existing paint or wallpaper off walls. This will make the damp-proofing stick better.
- Mix warm water and mild detergent, use a sponge or brush, and scrub away dirt, grease, and stains.
- Rinse with clean water and let the walls dry.
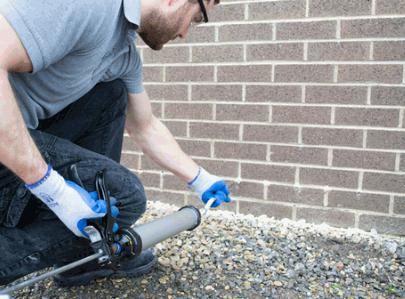
- Check for cracks or holes, and fill those areas with epoxy resin or mortar. A putty knife can be used to smooth out the filler. Follow the manufacturer’s instructions for drying times.
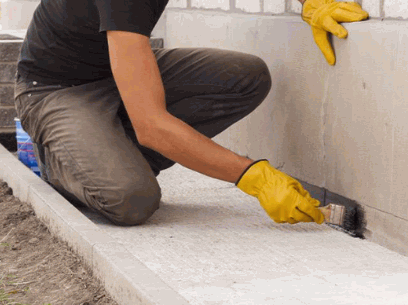
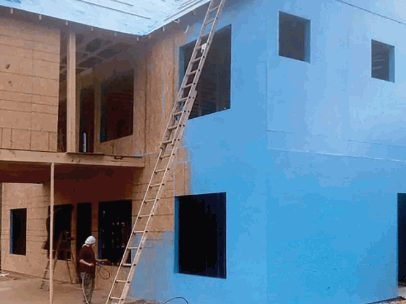
- Apply damp-proofing product on walls with a roller or brush. Liquid membrane or elastomeric coating can be used. Read the manufacturer’s instructions for application and drying.
These steps are necessary for damp-proofing. They guarantee a clean and solid surface for the damp-proofing product to stick. Paint or wallpaper removal makes it easier to adhere while cleaning gets rid of potential contaminants. Repairing cracks or holes stops moisture from coming into those areas, boosting damp-proofing effectiveness.
Choosing The Right Damp-Proofing Method
| Damp-Proofing Method | Benefits |
|---|---|
| Chemical DPC | Prevents rising damp. |
| Membrane DPC | Gives a physical barrier against moisture. |
| Cavity wall insulation | Reduces heat loss. Deterrent to condensation. |
| External rendering | Improves building appearance. Protects from dampness. |
It’s essential to consider other things too. Such as the gravity of the dampness, budget limits, and the property’s particular needs when choosing the best method.
In records of ancient times, we find that people then used primitive but effective methods to damp-proof their buildings. For example, the Romans combined hydraulic mortar with waterproof materials to keep water out of their buildings.
Applying The Chosen Damp-Proofing Method
It’s key to apply the right method when damp-proofing exterior walls. Here’s how:
- Check moisture levels: Inspect walls for signs of dampness or water damage. Use a moisture meter to determine the level and identify areas that need attention.
- Pick the suitable method: Depending on the severity and type of wall construction, choose the most suitable damp-proofing method. Options include chemical treatments, cavity wall insulation, or external waterproof membranes.
- Prepare the surface: Make sure the surface is clean and free from dirt, debris, and loose paint or render. Use a wire brush or pressure washer if needed, allowing sufficient drying time.
- Apply product: Follow the manufacturer’s instructions when applying your chosen damp-proofing product. Use a brush or roller as recommended.
- Allow time to dry and cure: Let the product dry and cure before painting or plastering over it. This will ensure maximum effectiveness in preventing moisture penetration.
Other factors to consider:
- Improve ventilation: Install vents or extractor fans in high-moisture areas like kitchens and bathrooms. Airflow can reduce condensation.
- Maintain gutters and downpipes: Inspect and clean gutters frequently to prevent blockages and leaks. Faulty gutter systems can cause water to pool around walls.
- Monitor landscaping: Avoid planting close to exterior walls as plants can retain moisture against surfaces, increasing humidity and exacerbating damp issues.
By following these steps and related factors, you can damp-proof exterior walls and protect your property from water damage.
Explore: How To Apply Damp Proof Paint On Exterior Walls
Additional Tips For Preventing Future Dampness
To preserve exterior walls, preventing future dampness is critical. Here are some helpful tips:
- Ensure proper drainage. Put in gutters, downspouts, and sloping in the landscape.
- Apply waterproof coatings. Create a barrier to keep out moisture.
- Improve ventilation. Put in vents or airbricks where humidity is high.
- Inspect & maintain external fixtures. Replace any damaged parts promptly.
- Monitor indoor humidity levels. Use a hygrometer & dehumidifiers if necessary.
Also, seal cracks & gaps. If there are signs of rising dampness or condensation, install a damp-proof course.
Keep in mind that these steps should be taken during construction & periodically throughout the life of your home. Proactive measures will protect your property from potential damage.
The past has had many examples of structures damaged by dampness without preventative measures. Ancient ruins are a reminder of the importance of damp-proofing exterior walls to ensure their stability.
Conclusion
Damp-proofing exterior walls is essential for keeping moisture away from your home. Follow the steps in this article to get it done right! Remember, prevention is better than cure.
- Check for cracks or gaps in the wall surface. Fix them with the right materials and techniques.
- Apply a waterproof coating, such as a liquid membrane or bituminous felt.
- Install a drainage system to redirect excess water away from the walls.
It’s important to follow these steps carefully. Neglecting any part can cause mold growth or damage. Invest time and effort into damp proofing for a dry and comfortable home.