
Yes! Painting plaster can make it look better, stop damage, and give you the chance to use different colors and finishes.
Preparation is essential. Clean any dirt, fix any cracks, and prime the plaster.
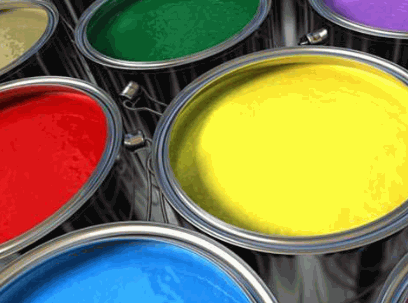
Then apply quality latex or acrylic paint. It’ll stick best.
For a professional finish, you may need to put on multiple coats. This will even out the color and texture. Allow enough time between coats for drying.
If your plaster needs a refresh, don’t wait. Paint it up with proper preparation and high-quality materials. It’ll look stunning and breathe life into your space.
Explore: How To Plaster Skim A Wall
Understanding Plaster
To understand plaster more effectively, dive into the world of this versatile material with a focus on its definition and composition. Explore the different types of plaster and gain a comprehensive insight into its various forms and uses.
Definition And Composition Of Plaster
Plaster is a multi-purpose material, often used in construction and art. Its composition is mainly gypsum, water, and other additives. Check out the table below for more details:
| Component | Percentage |
|---|---|
| Gypsum | 90-95% |
| Water | 5-10% |
| Additives | <5% |
Gypsum is the star ingredient. It’s a soft mineral that, when mixed with water, forms a paste. Additives like lime or cement make the plaster stronger and more durable.
Plus, plaster is adaptable! Wall plaster has sand for extra adhesion. Ornamental plaster may have fibers or fillers to create unique designs.
Pro Tip: Make sure the surface is clean before plastering. This will help get a smoother finish and better adhesion.
Types Of Plaster
Plaster is a versatile material used in building and decorating. It comes in different types, so understanding them is key to success in any plastering project. To get an idea of the types of plaster, here’s a table:
| Type of Plaster | Description |
|---|---|
| Gypsum Plaster | Made from gypsum rock. Common for interior walls and ceilings. Good fire resistance. Easy to work with. |
| Lime Plaster | From limestone. Flexible and breathable. Used since ancient times. Can be used inside and out. |
| Cement Plaster | Mix of cement, sand, and water. Durable and strong. Suitable for inside and out. |
| Clay Plaster | Organic alternative made from clay and natural fibers. Good insulation and moisture control. Environmentally friendly. |
Each type of plaster has qualities that make it good for certain projects or environments.
Did you know plaster has historical significance? Lime plaster was used by ancient civilizations like Mesopotamia and Egypt. Today, it is still appreciated for preserving historic buildings and creating beautiful finishes.
Preparing The Plaster For Painting
To prepare plaster for painting, ensure a smooth and flawless finish by cleaning the surface, filling any cracks or holes, and sanding the surface. These sub-sections offer solutions to optimize the paint adhesion and overall aesthetics of your plastered walls or surfaces.
Cleaning The Surface
Cleaning plaster is crucial to get the perfect paint job. Here’s how to do it:
- Remove any debris: Use a soft brush or broom to sweep away dust, dirt, or cobwebs.
- Wash with soap and water: Mix warm water and mild soap in a bucket. Use a sponge or cloth to scrub the surface in circular motions.
- Rinse: Rinse the surface with clean water. Wring out excess water before wiping.
Note: Different surfaces may require specific cleaning methods. Always refer to manufacturer instructions or seek professional advice.
Also, wear protective gloves and goggles while cleaning.
Fun Fact: Cleaned surfaces contribute to a longer-lasting paint job, according to Bob Vila!
Filling Any Cracks Or Holes
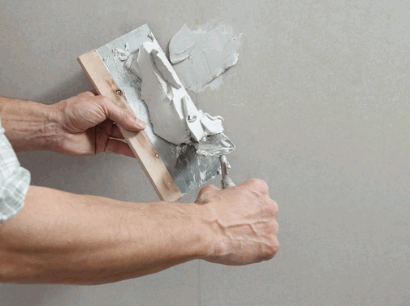
Inspect the plaster surface carefully! Look for cracks and holes – use a flashlight if needed for hidden imperfections. Clean the area with a damp cloth. This will help the filler material stick better. Generously apply an appropriate filler material like spackling paste or joint compound using a putty knife. Make sure the filler is level with the plaster surface.
Gently sand the filled areas with fine grit sandpaper, so it blends with the rest of the plaster. Then you’ll have a smooth and even surface for painting.
Remember, paying attention to detail during this phase will ensure a flawless finish when you apply paint.
Sanding The Surface
Sanding the surface is essential to prepare plaster for painting. It helps create smoothness & evenness, so the paint sticks & the result looks perfect! Here are 4 steps to sand correctly:
| Step | Grit | Motion |
|---|---|---|
| 1 | Coarse (80-120) | Circular, gentle pressure |
| 2 | Medium (150-180) | Circular, check for flaws |
| 3 | Be careful – scratches can show through the paint | Be careful – scratches can show through paint |
| 4 | Clean & inspect | Brush or vacuum dust & debris |
Proper sanding helps the paint adhere better, creating a polished look. Tips: Work in small sections. Keep tools clean. Test the sanded surface: run your hand over it. Smooth? Ready to paint! Enjoy sanding!
Choosing The Right Paint
To choose the right paint for plaster, explore paint options specifically designed for plaster surfaces and consider using a primer for optimal results. Paint options for plaster offer various finishes and formulas tailored for plaster’s unique properties. Primer for plaster provides a strong bond, smooth surface, and enhanced paint adhesion, creating a flawless finish.
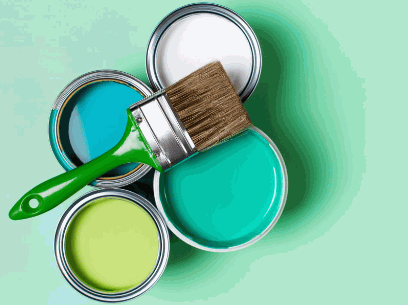
Paint Options For Plaster
Painting plaster walls requires thought. Consider the type of plaster, finish, and durability. Let’s explore some popular paint choices.
Firstly, latex paint works on most plasters. It dries fast and is easy to clean.

Oil-based paint provides good adhesion and a durable finish. It’s great for wet areas like bathrooms and kitchens. But it takes longer to dry and needs solvent-based cleaners.
Water-based acrylic paints are eco-friendly and retain color. They also dry fast, so are great for tight deadlines.
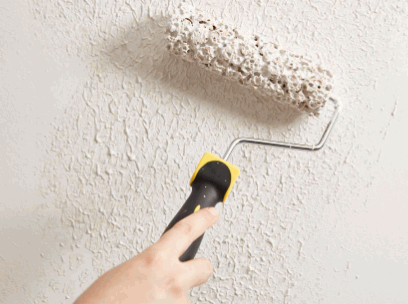
Textured paint adds depth to your plaster walls. Finishes such as sandstone or stucco can mask imperfections.
Before painting, prep the wall. Clean, smooth, and remove flaking or loose particles. Fill cracks and holes with filler materials before priming.
Primer For Plaster
When painting plaster surfaces, it is essential to apply the right primer. This ensures a smooth and even surface for the paint to stick to, making it more durable and long-lasting. Let’s explore!
| Primer Type | Features | Benefits |
|---|---|---|
| Oil-based | Adhesion & stain-blocking | Great for water/smoke stains |
| Water-based | Low odor, fast-drying, easy cleanup | Superb stain-blocking dries fast |
| Acrylic | High hiding power, bonds well | Ensures strong plaster-paint bond |
| Shellac | Superb stain-blocking dries fast | Seals off water stains effectively |
More info:
It’s important to choose a primer that suits your plaster surface. For new or untreated plaster, go for a high-quality acrylic primer. It has great bonding capabilities. If there are stains or discoloration, opt for an oil-based or shellac primer. They block stains well.
Painting The Plaster
To paint plaster, efficiently apply the first coat and allow it to dry before proceeding to apply additional coats. By following these steps, you can ensure a smooth and long-lasting paint finish on your plaster.
Applying The First Coat
For a smooth and professional finish when painting plaster, follow these five steps!
| 1. Clean the surface with a mild detergent and water. Use a cloth or sponge to get rid of any dirt. |
| 2. Spackling compound can fill any cracks or holes. Use a putty knife to spread it out, and flatten any excess. |
| 3. Priming the plaster before painting will help the color look even. |
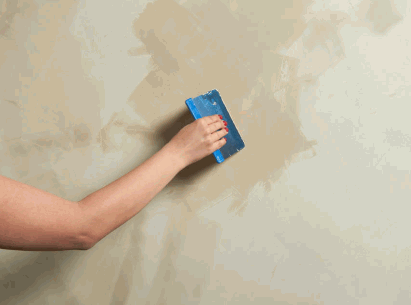
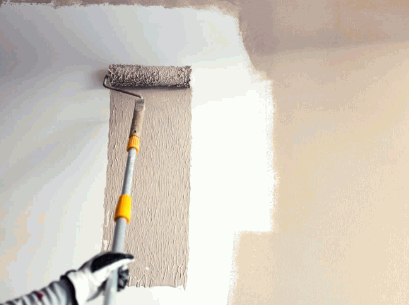
| 4. Roll or brush on the first coat from the top to bottom, using long, smooth strokes. |
| 5. Let the first coat dry before adding more. Check for spots that may need more coverage. |
Tips: Avoid applying too much paint – this can lead to drips. Also be aware of the room’s temperature and humidity levels, as they can affect drying and finish. Consider a paint additive if you are in hot/dry conditions, to reach optimal results without rushing.
Allowing For Drying Time
To get a perfect finish, it’s essential to let the plaster dry for a while. Follow these five simple steps to guarantee a successful drying process:
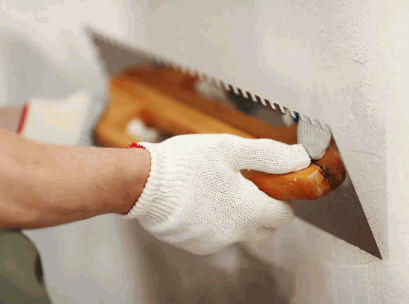
- Spread a thin layer of plaster over the desired area.
- Use a trowel or spatula to even out any irregularities.
- Let it dry for 24 hours, depending on how thick the layer is.
- Don’t expose the plaster to too much heat or humidity. It could cause cracking and lengthen the drying time.
- Test if the plaster is dry by tapping it lightly with your knuckles. If it sounds hollow, it’s ready.
Don’t rush the drying process or it may damage the outcome. Give each layer its own drying time.
Did you know the Ancient Egyptians mixed gypsum and water to make plaster? They applied it to walls and sculptures, then waited weeks before painting them. This shows they knew how important it was to wait for the plaster to dry.
So when dealing with materials that need drying time, be patient. Take your time and appreciate the artistry involved in achieving a beautiful result.
Applying Additional Coats
Painting plaster? To get a long-lasting, polished finish, you need to apply multiple coats. Here’s a 5-step guide to do it right!
| Step | Description |
|---|---|
| 1 | Prep the surface. Clean it with a soft brush or vacuum. |
| 2 | Sand the previous coat with fine-grit sandpaper. This smooths it out and helps the next coat stick. |
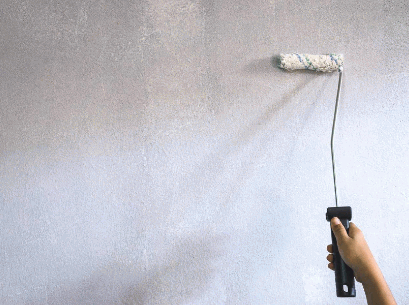
| 3 | Prime the entire surface. Use a roller or brush for even coverage. Let it dry per manufacturer’s instructions. |
| 4 | Prime the entire surface. Use a roller or brush for even coverage. Let it dry per the manufacturer’s instructions. |
| 5 | Apply another coat of paint. Start in one corner and use long, even strokes. Keep a wet edge to avoid brush or roller lines. Each coat should be thin and evenly spread. Let it dry fully between coats. |
For extra finesse, add glaze or faux finishing. Different types of paint may need different techniques or prep steps, so double-check before getting started.
The Paint Research Association found that 2+ coats of paint significantly increase its lifespan and durability. So, it’s worth the extra effort!
Finishing Touches
To achieve flawless results in your finishing touches, dive into the sub-sections of removing any imperfections, final coat, and touch-ups. These steps will provide the solution you need to ensure a smooth, polished surface for painting plaster.
Removing Any Imperfections
For a perfect end result, it’s important to address any imperfections. Follow these steps to get a smooth finish:
- Prep the surface – Get rid of any dirt, grease, or loose particles.
- Fill gaps – Use a good filler for gaps or cracks. Let it dry.
- Sanding – Sand the surface with a fine-grit sandpaper.
- Priming & Painting – Apply primer for the material type. Then paint.
Take note of special details of the project – techniques and materials needed. Pay attention and follow the steps for professional results.
View imperfections as an opportunity to be creative and achieve beautiful projects. Perfection is in the details!
Final Coat And Touch-Ups
The final coat is the last layer of paint or finish applied to a surface. It’s crucial for durability, protection, and a better look. Touch-ups are corrections of scratches, dents, or color issues. Precise work is needed for this. Final coat and touch-ups can be used for painting, woodworking, furniture making, and even cosmetics. Investing in them increases value, life, and appearance.
It’s important to conscientiously perform final coat and touch-ups through the entire timeline. Failing to do so can lead to poor results requiring rework or damaging quality.
These touches also enhance customer satisfaction. Showing a dedication to excellence by addressing small imperfections before completion showcases the craftsmanship.
Home Improvement Magazine stated that homes with final coat and touch-ups tend to have higher resale values compared to those without this attention to detail.
Conclusion
Paint on plaster? Absolutely! It’s a great way to spruce up any interior. But before you start, make sure to clean the surface and apply a primer for proper adhesion. With the right tools, like high-quality brushes or rollers, you can achieve a smooth, professional finish. Plus, you can choose from a range of paint finishes to suit your preference – matte, glossy, or anything in between.
Painting plaster has a long history. Ancient civilizations would use plaster walls to artistically depict scenes from their lives. These detailed surfaces were both decorative and a record of the past.